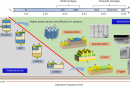


Home automation allows controlling appliances, lighting, heating and more from a central hub or smartphone app. While commercial systems are available, many hobbyists enjoy building their own customized solutions using standalone microcontrollers. This guide explores the components, design considerations and steps for constructing your own homegrown home automation system.
Planning the System Architecture
The first step is deciding on the overall architecture and components:
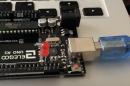
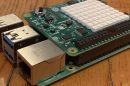
Microcontroller Board
This serves as the brain coordinating everything, running the control software and connecting to sensors and relays. Arduino, Raspberry Pi, and ESP32 are popular options.
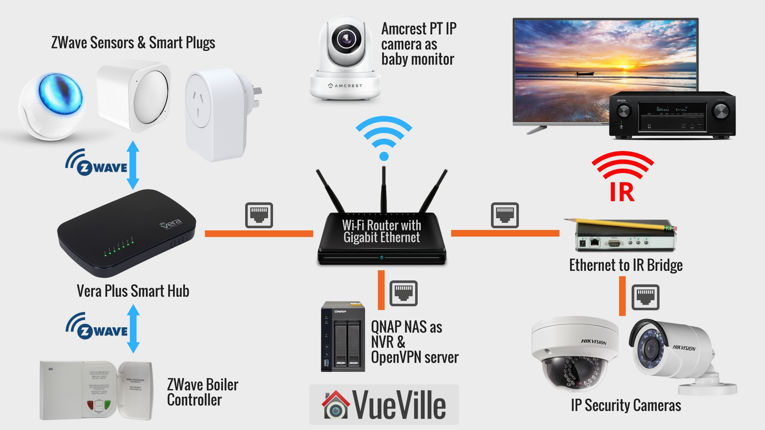
Wireless Communication
Connect microcontrollers in each room over WiFi, Bluetooth or RF links. Consider range, power and number of nodes.
Sensors
Detect motion, light, temperature, moisture and more. Inputs for automation rules.
Actuators
Relays, motors and controllers that interface with the devices being automated.
User Interfaces
Control panels, touch screens, mobile apps and voice commands for system interaction.
Power Supply
Each node needs adequate power, either with batteries, USB, or DC adapters.
Enclosures
For neat permanent installations, house components in boxes with connection terminals.
Think about the types of sensors, controls and interfaces needed in each room. Draw up a schematic diagram showing how all the parts connect before building.
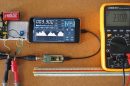
Input: Sensors and Detectors
Sensors allow the automation system to monitor conditions like occupancy, daylight, temperature and humidity. Common home automation sensors include:
-
PIR Motion – Detect room occupancy and activity
-
Door/Window – Monitor opens/closes with magnetic or vibration sensors
-
Current Transformer – Clamp onto appliance cords to monitor power usage
-
Photoresistor – Daylight sensing to trigger lights at dusk
-
Temperature – Thermistors or ICs like the LM35
-
Moisture – Soil or leak detection with probes
-
Gas/Air Quality – MQ series sensors detect gases like CO2
-
Ultrasonic/Time-of-Flight – Distance/proximity sensing
The microcontroller digitally samples these sensors, often through an analog-to-digital converter, and uses threshold logic to trigger automation rules.
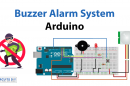
Output: Relays and Actuators
Based on sensor inputs, the system needs to control lights, appliances and other devices via:
Electromechanical Relays
- Allows microcontroller to switch higher voltages like 120/240VAC
- Protect relay coils with flyback diodes
Solid State Relays (SSRs)
- No moving parts, useful for noise sensitive circuits
- Avoid voltage spikes with snubber
Motor Controllers
- Variable speed and direction control for motors
- Use transistor, MOSFET, or dedicated modules
Light Dimmers
- Varies brightness of incandescent and LED lights
- Use PWM, TRIAC, or dedicated dimmer ICs
Solenoid Valves
- Open/close fluid and gas lines
- Often used for sprinkler and HVAC zoning
The right interface depends on the type of load being controlled. Take safety precautions like fusing when switching mains power.
Communication Protocols and Topologies
Devices across the home need to communicate sensory information and receive control commands. There are several approaches:
WiFi
- Leverage existing home WiFi network
- TCP/IP between nodes
Bluetooth
- Mesh network with BLE devices
- Lower power but limited range
Proprietary RF
- Custom protocols over radio links
- Long range with high power
Power Line Communication
- Transmit data through existing electrical wiring
- Susceptible to noise
Wired Bus
- RS485 multidrop links multiple nodes
- Fast and reliable but requires cabling
Choose a protocol that meets range, bandwidth and wiring requirements. A mesh of wireless nodes provides flexibility while wired backbones offer robustness.
User Interfaces for Control and Monitoring
Occupants need intuitive ways to interact with home automation:
-
Touch Screens – Wall-mounted panels for each room
-
Smart Speakers – Voice control through natural language
-
Smartphone Apps – Control from iOS or Android devices
-
Web Interfaces – Dashboards accessible over home network
-
Physical Switches/Scenes – Tactile remote switches as backups
-
Notifications – Email/text alerts for certain events like leaks
Consider UX and how users want to control their environment. Voice assistants and smartphone apps provide convenience while physical interfaces are important for visibility and feedback.
Automation Rules and Programming
The true power comes from automatically coordinating devices based on sensory triggers. Example rules include:
- If motion detected, turn on lights
- If daylight below threshold at 6pm, turn on porch light
- If temperature exceeds 90F, lower thermostat
- If front door opens, chime sounds
- If moisture sensed, turn off water valve
These rules are coded into the microcontroller software using conditional statements like IF-THEN-ELSE. Additional logic enhances scenarios, like only activating at certain times or days. Python, Arduino C++, Node-RED and IFTTT provide rule building blocks.
Consider convenience, energy savings and security when defining automation behaviors. Add delays and other tweaks to prevent unintended consequences.
Building a Long Term Reliable System
Here are some tips for constructing a robust home automation system:
-
Use flexible stranded wiring between nodes to avoid brittle breakage
-
Print node numbers and terminals on enclosures for easier maintenance
-
Include power filtration capacitors near relays and motors to reduce electrical noise
-
Fuse all AC outputs to safely handle short circuits or overloads
-
Place critical sensors and nodes on UPS battery backups to ride out power blips
-
Handle all sensor inputs defensively in code for garbage values
-
Support over-the-air firmware updates to easily enhance features and fix bugs
-
Document the locations and connections between nodes on a map
-
Use cable raceways or conduits for protected permanent wiring runs
With careful planning, you can build an automation system providing convenience and efficiency for years to come.
Conclusion
Building your own home automation system allows customizing it exactly for your needs while learning about electronics and programming. With creativity, even basic components like Arduino boards, sensors and relays can enable powerful functionality. The modular approach lets you start small with just a few nodes and expand it over time. As homes continue gaining intelligence moving into the future, the ability to design your own smart home from the ground up provides valuable insights and satisfaction.