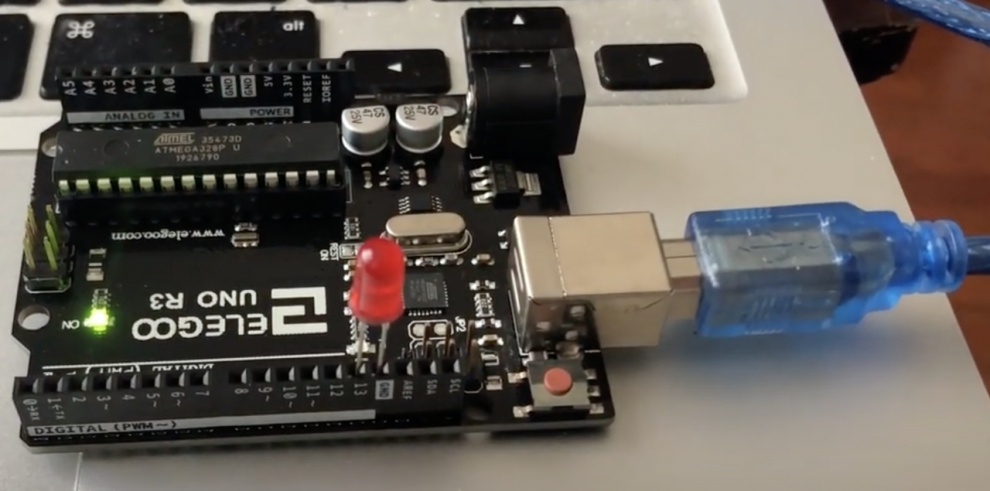
LED lighting has become ubiquitous in modern life, from home lighting to displays and monitors. With programmable microcontrollers, LEDs can be orchestrated into dazzling animated light shows and visualizations. This guide explores the hardware and software involved in building custom LED-based lighting projects using microcontrollers like Arduino and Raspberry Pi.
Why Use Microcontrollers for LED Projects?
Microcontrollers are tiny self-contained computers on a chip designed specifically for interacting with electronics hardware and embedded systems. They provide:
- Digital I/O to interface with LEDs and other components
- Precise timing for animations and effects
- Programming in C/C++, Python and other languages
- Small form factor and low cost
Combining microcontrollers with LED lights enables capabilities far beyond static illumination:
- Complex animations and effects
- Music visualization and light shows
- Dynamic decorative lighting
- Artistic LED sculptures and installations
- Gamified displays and user interactivity
Robert Heiss, professor of electrical engineering at Ohio State University, explains:
“The programmability of microcontrollers paired with the RGB pixel freedom of LEDs provides endless possibilities for dynamic and artistic lighting projects.”
Selecting LED Strips and Modules
Modern LED strips and modules come in addressable varieties that allow control of each LED individually using digital protocols like WS2812 and APA102. This enables advanced effects by modifying the color and brightness of any LED on the fly. Key factors when selecting such addressable LEDs include:
Number of LEDs – Strips can have 30, 60, 144 or more LEDs per meter
Pixel Pitch – Distance between each LED, like 10mm. Affects resolution of patterns.
Viewing Angle – Beam width of each LED, like 120-180 degrees
Pixel Shape – Square 3535 vs rectangle 5050 style LED modules
Current Rating – 20mA, 30mA etc. Sets max brightness.
Data Signal – Common protocols are WS2811, WS2812, SK6812, APA102
Adafruit NeoPixel and DotStar brands provide quality and reliable addressable strips and matrices for projects. Consider the desired density, viewing angle, shape and data signal when selecting LED products.
Powering LED Strips and Modules
Addressable LED strips can draw significant power, especially at full white brightness. A 5 meter strip with 30 LEDs/meter requires at least 15 Amps at 5V to operate at max brightness. There are several options to power LED strips:
USB Power
- Limited to around 1 Amp, so only for short strips
- Convenient for testing on a breadboard
Wall Adapters
- Compact AC adapters ranging from 5V/2A to 5V/10A+
- Offers simple setup but less flexibility
Computer Supplies
- Repurposed 5V desktop PC supplies can provide plenty of power
- Molex or SATA connectors interface with LEDs
Dedicated LED Drivers
- Specialized constant voltage power supplies for LEDs
- Dimmable, high power models available
Battery Packs
- Rechargeable LiPo packs for portable projects
- Battery level monitoring is advised
Use thick stranded wire and solder or screw terminals to safely connect strips to the power supply. Pay attention to required voltage, power capacity and wire gauge.
Microcontroller Interfacing Concepts
The basic method for controlling addressable LEDs with a microcontroller involves:
-
Data Connection – Connect data line from the LED strip to a digital output pin on the microcontroller.
-
Code – Write code that generates data packets for the LED strip protocol. Common libraries exist for Arduino, Raspberry Pi and more. The code sets the color and brightness of each LED pixel to create the lighting animations and effects.
-
Power – Provide 5V power to both the LED strip and the microcontroller board. Level shifting may be needed between 3.3V and 5V logic.
-
User Input – Optional analog sensors or buttons allow user interactivity to modify the light output.
WS2812 and similar protocols use high speed one-way serial communication to update the LEDs up to 800 kHz. Precise timings are required to latch the pixel data. Each LED holds its last received data until updated again.
Sample Microcontroller Projects
Here are some examples of fun LED strip projects with different microcontrollers:
Music Visualizer with Arduino
Use an electret microphone and MSGEQ7 audio spectrum IC to generate color bands that pulse to music. Reacts to live audio input.
Rainbow Fader with Raspberry Pi
Python code linearly crossfades through the colors of the rainbow for a smooth cycling effect.
Noise-Reactive Bedroom Lights with Teensy
An electret mic and op amp feed audio levels to create animated patterns that dance along with ambient sounds.
Pac-Man Game with Micro:bit
Control a Pac-Man LED sprite with tilting gestures and avoid ghosts generated by the microcontroller code.
Laser Gun Game with Arduino
Infrared transmitter and receiver allow two players to ‘shoot’ at each other’s LED vest targets for a light show shootout game.
The variety of inexpensive development boards provides many options for achieving unique LED projects.
Advanced Control Interfaces and Interactivity
For more advanced and responsive lighting effects, consider adding analog and digital sensors as inputs to vary the LED animation code:
Photocells – For brightness-reactive ambient lighting
Temperature Sensors – Change color based on temperature
Ultrasonic Sensors – Modify patterns based on viewer proximity
Microphones – Convert audio to frequency and amplitude levels
PIR Motion – Activate patterns when movement is detected
Buttons – Allow the viewer to change animation modes and interact
Smartphone Apps – Control lighting via Bluetooth or a custom web app
DMX512 – Interface with standard stage lighting controllers
MIDI – Convert MIDI note messages into light data for musicality
The microcontroller makes it easy to sample these inputs and map sensor levels to different display effects in real time for an immersive experience.
Tips for Reliable Projects
Here are some tips for building robust LED installations with microcontrollers:
-
Use twisting and connectors to interface between long runs of LED strips to avoid voltage drops.
-
Add filter capacitors near the power connections of the LEDs to reduce noise and flicker.
-
Limit the length of power wires and minimize series resistance. Thicker gauges help over distance.
-
In outdoor settings, add weatherproof enclosures and silicone sealant to protect components.
-
Include fuses, overvoltage protection and adequate heat sinking to prevent blows.
-
For installations across multiple rooms, look into DMX512 distributed control.
-
Write code defensively to handle exceptions and invalid sensor values gracefully.
-
Consider WiFi connectivity for remote monitoring and control.
With careful planning, you can build LED-based lighting displays that provide years of dazzling and dynamic effects for any venue.
Conclusion
The combination of addressable full color LED strips and programmable microcontrollers provides endless options for building custom LED-based light shows and reactive installations. With the ability to control each LED pixel individually, animations and effects limited only by the imagination can be realized. By leveraging the sensing and programming capabilities of boards like Arduino and Raspberry Pi, the lights can move and groove along with music or environment in real time. As LED and controller technology improves, we can expect to see ever more stunning and intricate LED-centric art, decor and visual experiences brightening our world.


